Friday, July 26, 2013

Living our Life like a Song- New Blog

Hello readers!

My husband and I have been relocated to London and we are moving October 14th!! We are so excited to be able to share this experience with one another. I think this will be a great opportunity to develop and strengthen our marriage, as I am sure there will be many obstacles that we will encounter during our move.

Brett and I plan to be in London for at least two years with the eventual plans to return to the United States.

With that in mind, I have decided to start a travel/lifestyle blog where I can share my experiences as an expat! I would love it if you could jump over to Living our Life like a Song and follow our journey!
Living Our Life Like A Song

Here is an excerpt of something I am working on for my next post:

So I'm going to go off track here for a second- but I can't help think how lucky and blessed I really am. I haven't been very active in my religion recently but the other night I felt compelled to just take a minute and thank God for everything he has blessed me with. In high school I never would have dreamed that my life would play out the way it has. I feel like Charlotte from SATC movie where she is scared that something bad is going to happen to her because her life is so perfect. Now, I wouldn't say that my life is perfect, but it's perfect enough for me!

As we prepare and being to tell people we are moving, I am starting to get a little choked up. Since Brett and I live in Chicago, I was wondering how many more times my parents would see me if I lived in the states as opposed to when I move abroad. I counted that my parents on average see me 8 times a year with us living in Chicago, and when we move to London, it will only be 2-3 (Christmas, parents visit, maybe one more trip home). So that was a little upsetting to think about.

Thanks so much for reading!


Wednesday, June 5, 2013

Bulgar Salad

Happy hump day! I'm so stoked to tell you about my lunch today, but first let me share a little of my weekend.

Our "prom pose"
This weekend, we were graced with some serious summer weather! The daytime temperature hovered in the 90's and the nights were in the 70's, making it perfect for grilling (don't worry--I'll be sharing some of these grill recipes very soon!). It was also perfect weather for bike riding, gardening, walking the dog, and just lounging in my backyard in my bathing suit, soaking up some rays. Such relaxation! I felt like I was on a tropical vacation, right in my own city. Oh! And did I mention I went to prom this weekend too?! My husband teaches at an alternative high school in the city, so we decided to attend their prom/end-of-year social, which just so happened to be on a rooftop in Chelsea, near the High Line and the Meatpacking District. OMG! Talk about the views! The sunset over the Hudson River was just breathtaking, and definitely a rare treat for this Brooklyn resident.
My corsage. This was Steve's first prom! 

Anyway, back to the reality of the work week and that lunch of mine. Remember the trip I took to Jungle Jim's while I was in Ohio a couple of weeks ago? Well, while I was there I picked up some bulk bulgar wheat because I wanted to try to make this bulgar and lentils salad I really love from my favorite local Mediterranean spot. And man did I strike some serious health-food gold when I thought of the salad I am going to share with you today.

Bulgar is super easy to make, and it's high-fiber, low-calorie, and low-fat, making it a great option for lunch. I made my first batch the other night for that bulgar and lentils salad, and while it was yummy, I've been contemplating more flavorful ways of preparing it as compared to simple hot water and salt. And I'd say I definitely succeeded here.

Preparing the Bulgar
For those of you who don't know, bulgar is a type of cracked whole wheat grain. Often it is sold already partially cooked, making it quick to make. There is a fine grain version available that is considered "instant" because it only takes about 5 minutes to cook through. Medium and course grains are also available if you want more bite behind your cracked wheat, although they take a little longer to cook. Most health food stores stock bulgar wheat in the bulk food section, although you may also find it in the baking or cereal aisles.


When I purchased my bulgar, I chose a medium grain (it was labeled as "#2") because I wanted a little more bite. I began by heating some water to boiling using a tea kettle. While it was heating, I prepared the seasoning, which really is what made this batch of bulgar so yummy compared to my last batch. I used about a teaspoon each of harissa, curry, red pepper flakes, and red and black sea salt from Hawaii for their mineral content--although regular sea salt would work just fine. I also chopped up some spring onion and fresh mint and tossed them in. You could also add garlic or lime juice if you have it available, or even replace the water with some vegetable or chicken stock for added variety and flavor. When the water started to boil, I added 1 1/3 cup to the seasoning mix and gave it a good stir. I then added a cup of the bulgar wheat, gave it a quick stir, and let it sit, covered, for 20 minutes. If the water is not entirely absorbed after 20 minutes, just let it sit a little longer. I then fluffed with a fork and added some fresh cracked black pepper before giving it a taste. YUM! And because I actually made it last night, I then put it in the refrigerator until this morning when I made my husband and myself our lunches.

Putting together the remainder of the salad was pretty simple, and only added about 10 minutes to my morning routine. I rinsed the lettuce, which I purchased from the local farmer's market this weekend, and gave it a rough chop. I then added a few heaping spoonfuls of the bulgar on top of the lettuce. Since it's almost time for me to go shopping again, my salad fixings were sparse, but if I had some in the house I would have also added tomato and cucumber, and maybe some dried fruit such as cranberries. I also added some sunflower seeds for their healthy fat content and high levels of vitamin E and magnesium, although almonds or walnuts would also be yummy. For added protein I included a hardboiled egg, although the bulgar does add a bit of protein on its own. Finally, I drizzled some hempseed oil over the top, which is a nutty tasting alternative to flaxseed oil and fish oil with additional health benefits (it does not contain THC). A little Greek yogurt or tzatziki sauce (cucumber and dill sauce), or even capers and olives would add a nice touch to this salad if you're looking for a little more variety.


p.s. For other great salad ideas, be sure to check out our Recipe Index! :)

Friday, May 31, 2013

Semisweet Chocolate Cupcakes with Chocolate Icing & Rosemary Sea Salt


Although it's nearly summer, I'm not the type of girl to fret over whether or not I'll fit into my short shorts and bikini tops. Instead, I'm the type of girl who will pair a pastrami sandwich (with saurkraut!) with an entire package of Tate's butterscotch pecan cookies and then reach for some Talenti's sea salt caramel gelato for dessert... In case you were wondering about my Memorial Day meal, there ya have it!

Despite my sweet tooth, I've never been much of a baker. I find the whole process to be too scientific, and to be frank I'm far too impatient for all that precise measuring. I'd much rather toss in a dash of this and a pinch of that and then adjust things according to how it tastes and baking just doesn't afford this luxury. So you can imagine my surprise when, one cold morning this past January, I found myself dreaming up a recipe for chocolate cupcakes. I was going through a salty+sweet kick and really wanted to make something decadent using semisweet chocolate and these rosemary sea salt flakes I had just scored from the market. I consulted my Joy of Cooking cookbook and nearly fell over at the recipe for chocolate cupcakes: not only did the instructions state that everything needed to be 70°F or some crazy nonsense but they also stated that I'd need to whip the egg whites before adding them to the batter. WHAT?! Ain't nobody got time for dat!

So I put down the cookbook and very swiftly backed away... right to my local pub. Now, before you brush me off as a fat kid with a drinking problem, let me tell you that my favorite bartender, Mel, is also a trained chef with a speciality in baking. She makes some of the most divine backed goods, and she speaks of making them with such ease, so I just knew that in addition to providing me with a beer to ease the baking pain, she'd be able to provide me with some sound advice. And she did.


When you resign to baking anything from scratch, you just have to accept the fact that it's not going to be the simplest thing you've ever done, especially at first. However, the end product is (hopefully) going to be something to brag about! Oh, and that 70°F nonsense? Well, that basically just means your ingredients perform best at room temperature.

Cupcakes
1 1/2 sticks unsalted butter
1 c brown sugar, packed
2 eggs, separated
1 tbsp vanilla
2 tsp cayenne
1 c buttermilk
1/2 c sour cream
4 oz semisweet chocolate
1 tbsp brewed coffee
1 3/4 c flour
1 1/2 tsp baking soda
1/2 tsp salt

Preheat oven to 350°F and either line your cupcake pans with paper liners or lightly grease them with butter and flour.


Begin by melting the chocolate using a double boiler. If you do not have an actual double boiler, you can make one by placing a smaller pot inside a larger pot of boiling water. Place the chocolate in the smaller pot, and stir continuously until the chocolate melts completely. Remove from heat. Then use a whisk to whip together the sour cream, buttermilk, coffee, and melted chocolate. Take this time to also sift together the dry ingredients.

If you have the option, use the paddle attachment for your electric mixer. On high speed, cream the butter and sugar for about 5 minutes or until the mixture becomes light and fluffy like in the photo. Decrease the speed and add the egg yolks, vanilla, and cayenne. I also added about 1 teaspoon each coriander and cumin because life is about the spice and I like to take risks. In hindsight, I would probably have omitted the coriander as it was admittedly a bit intense. Beat the mixture on high for a few minutes just to blend it all. Reduce the speed to low and add 1/3 of the chocolate mixture, beating until blended, then add 1/3 of the flour mixture. Continue to add the chocolate and flour mixtures alternately in thirds until gone. Beat until blended. Meanwhile, using a hand mixer, whip the egg whites just until peaks start to form. Then fold the egg whites into the batter.  **If this is a major stopping point for you in this recipe, let me first say that I don't blame you (see: above). However, don't give up! You could also just add the eggs whole with the vanilla and cayenne and skip whipping the egg whites; the cupcakes will just turn out a little less fluffy.

Divide the batter amongst the cupcake pans, filling each cup about halfway. Bake for about 12-15 minutes, or until a toothpick inserted in the middle comes out clean.

Chocolate Meringue Icing
1/2 stick butter, room temperature
1/2 c sugar
2 egg whites
2 oz semisweet chocolate, melted
1 tbsp vanilla

Using the whisk attachment of an electric mixer, cream the sugar and butter on high speed until the mixture becomes light and fluffy, about 5 minutes. Reduce the speed and add the chocolate and vanilla. Beat until blended. Add the egg whites and whip on high until the mixture becomes lighter in color and fluffy. Then let chill in the refrigerator until the cupcakes are cooled completely.

After frosting the cupcakes, I sprinkled them with the rosemary sea salt flakes. Then I placed the cupcakes in the refrigerator to set overnight... I plan to experiment with the frosting in future recipes as this icing unfortunately turned out more runny than meringue-y, although it did taste okay.

Well, that's my baking adventure... I wish you luck with your own! And feel free to share your favorite salty+sweet combination with us in the comments below! :)


p.s. The cupcake recipe was adapted from Joy of Cooking as well as here.

Wednesday, May 29, 2013

Jalapeno & Strawberry Chicken Salad with a Balsamic Lime Vinaigrette


So it's down to the last few days of the month and unfortunately I have almost ran out of my budgeted lunch money! My husband and I are both in the Finance/ Accounting world and we monitor our finances and budgets pretty closely. We set up realistic budgets where we can live comfortably, but monitor them so that we don't accidentally spend $7,000 on lunches for the month. I bet most people would agree that a majority of your disposable income  (excluding any fixed payments) goes to food and alcohol (well maybe the latter is just us), and monitoring our spending in this category helps us save up for the wonderful vacations we go on!

So since we didn't have much left in our lunch budgets, I grilled up a few chicken breasts on Monday to make a healthy chicken salad for a few lunches this week.

Although I cooked the chicken on Monday, I was torn about how I wanted to make the salad. Different combinations went through my head. Black bean and grilled corn was on the list, but also required a little more prep. Then this morning I was scrolling through my Bloglovin newsfeed and saw a post about Strawberry Jalapeno Margaritas, and I was sold. I could easily throw together this chicken salad in less than 15 minutes and be out the door for work with a healthy and filling lunch!

I'll give you the run-down on the ingredients- no measurements here, just add the ingredients to your liking! Looking back on my recipe, I believe I gained inspiration from those delicious salads with strawberries and a balsamic vinaigrette.

Instructions:
Grill chicken with salt and pepper and tear chicken into bit sized pieces. Add minced jalapeno, red onion, cilantro and sliced strawberries. Prepare a simple balsamic vinaigrette by combining, 1 part vinegar, 1/2 part olive oil and 1 part lime juice. Pour over salad and combine well. Adjust seasonings to your liking.

Serve with romaine lettuce wraps or crackers.


And there you go- pretty simple, healthy and satisfying! I ate my lunch on the steps of the Chicago Art Museum today and it was heavenly! Wish this beautiful weather would have shown itself last weekend! Instead it was cold and in the 60's.  Why do I live here again? I guess that could very well be a doctoral dissertation.

What did you guys eat over Memorial Day? Did you do any unique alternatives to the classic Memorial Day dishes?


Wednesday, May 22, 2013

Teriyaki Burgers with Grilled Pineapple and Red Onions


Greetings from Cincinnati! Or, more aptly, Owensville, Ohio, where Mary and myself hail from. My husband and I are in town for the week after spending the past weekend in Cleveland for a wedding. The bride was my very first friend in college and the wedding was just gorgeous! I had such a great time that I sprained my foot while dancing and I've spent the past few days limping around, thanking my lucky stars that I'm not back home in Brooklyn where my busted foot would be the equivalent of a flat tire.

The weather in Cincinnati has been gorgeous and Steve and I (as well as Charlie) have had a great week relaxing, enjoying the sunshine and the fresh air. My parents live in the middle of a hundred-acre wood, so although their lack of Internet has made this post extremely difficult to accomplish (I'm using an iPad right now), the break from all the hullabaloo has been very welcomed. And while there are so many different things I want to share with you, dear readers, I think I'm just going to jump right in and share my culinary adventure from this week. 

We started our week here with a trip to the famed Jungle Jim's to pick up some international goodies to bring back home to Brooklyn because, although we live amongst a swarm of various cultures and their accompanying cultural markets, these still don't compare to Jungle Jim's. If you live in Cincinnati and you're yet to check it out, run, don't walk!, there right now. I'd recommend the Eastgate location because not only is it newer and thus better organized, they also have a few speciality markets at the entrance such as Flying Olive and Colonel De's Spice Market that are worth a browse. 

We decided we wanted to make dinner for my folks each night we were in town, and because the weather was so great we decided to kick off the week with a grilling adventure. We haven't yet had the time to pull out our own grill for the season, which made this opportunity all the more inviting. We settled on grilling some burgers but we wanted to add an adventurous twist in order to impress the fam with our culinary talents, so Steve came up with the idea of adding grilled pineapple and caramelized red onion seasoned with teriyaki sauce. I've never had pineapple on a burger before, and I must say grilled pineapple is now amongst my most favorite fruit.  It's so yummy! And the grilled sweetness really adds a unique flavor combination to the burger meat and teriyaki sauce. The only change I'd make to these burgers is I'd like to try them on the "Three Meal Muffin" instead of onion rolls because, as I stated in my turkey burger post, they're simply the best burger bun out there. 

1. Prepare the burger meat by seasoning it with salt, pepper, some minced garlic, and a dash or two of teriyaki sauce. Divide and form into patties. Set aside until the grill is hot and ready. 

2. Prepare additional ingredients. Remove the pineapple rind and slice into rings. I cut them thick, but you can cut them to your preferred thickness depending on if you want a little less or little more pineapple flavor. Also slice the red onion. My knife was dull so I didn't cut perfect rings, but they still worked out just fine. After slicing the onion, we created a foil pouch for them to cook in on the grill, and seasoned with a dash of teriyaki. 

After your ingredients are prepared and your grill is hot, toss everything on and grill to your standards of perfection! We also grilled a side of brussel sprouts and asparagus, both of which we just lightly seasoned with a little EVOO and a dash of salt and pepper. 

And did I mention that this dish is a great way to impress your family and friends this weekend at your Memorial Day barbecue?! Because it is! 

Finally, here is a picture of my husband and I from the wedding last weekend. :)


Tuesday, May 21, 2013

Roasted Corn and Poblano Soup with Grilled Shrimp


Since Brett is STILL out of town, I got a little creative in the kitchen last night, mixing new flavor combinations. I was brainstorming at work thinking about the items in my refrigerator and the veggies from last week that were on their last leg. Corn was specifically on my list, and I had a poblano that I frequently have in house, but am not always sure on how to use it- salsa, huervos rancheros or fajitas are my go-to's.

So I'm not going to lie- I had one hell of a time getting this soup to taste right. Mainly because it was a little outside my comfort zone, even though going through the process I was super confident. I spent forever trying to fix the flavors, but I digress...

I wanted to share this with you to give you some food for thought (literally), on this flavor combination, or to get you thinking about how you would do it differently!

Here is what I did...

Prepare poblano pepper by fire roasting over an open flame until completely charred, place in a glass bowl, cover with plastic and allow to steam for 5 minutes to allow the skin to easily peel off. After 5 minutes, place under running water and begin to peel off skin. Remove top, seeds, and gills and cut into squares.

While poblano is steaming, begin to saute 1/2 a red onion and begin to cut away the corn kernels from the corn cob (2 ears of corn). Add corn, diced poblano, 2 cloves minced garlic, salt & pepper, and allow to saute for 10-15 minutes to allow corn to cook. Add just enough water to cover vegetables, and allow to simmer for another 5 minutes.

Add in increments to food processor, blending on high until smooth, replace back into pot. Add more seasonings to your liking. Here is where it got crazy on me... I tried adding cilantro, butter, milk, cumin, red pepper flakes, lime and even sugar (because I tasted a slight bitterness). To no avail, guys!

I topped my soup with simply grilled shrimp, sour cream, cilantro and a squeeze of lime.


Maybe it will be better today, but let me just say I wasn't too impressed, and thankfully Brett wasn't home otherwise I would have had a hungry husband (shout out to my favorite English teacher for that alliteration- Trisha).

Maybe my corn to poblano ratio was off... Even re-reading this recipe, I think it sounds amazing, but it left me hanging for some reason. I'll try again later and let you guys know how it goes.

Have a great day!


Monday, May 20, 2013

Stuffed Mushrooms with Goat Cheese and Spicy Pork Sausage

Ok so I might have lost some "non-mushroom-friendly" readers after my last few posts that have included mushrooms, but right now I just can't get enough of them!
Over the past few months, I feel like stuffed mushrooms have been everywhere I go. Just this past weekend, we had stuffed mushrooms as an aperitif at a wedding in Ohio. And a few weeks ago we had stuffed mushrooms at a Spanish Tapas restaurant.

When my husband is out of town, I don't typically have as much motivation to cook big intricate meals. With this being his second week out of town, I made these stuffed mushrooms on Sunday after the long drive back from Ohio. (Ironically Maegan and her husband were also in Ohio this weekend, for a separate wedding. Unfortunately though, we were not able to see each other.)

Stuffed Mushrooms
makes 6 (may need to double the ingredients to accommodate more than 2 ppl)

1 Spicy Italian Pork sausage
2 oz or half a small log of Goat Cheese
6 Mushrooms, cleaned
Green onion for garnish

I bought the sausage from Whole Foods, their sausage is really high quality as they make it fresh in house everyday. Additionally it does not contain additives or preservatives which is something I try to stay away from. A couple other reasons I really like buying sausage from Whole foods: 1. there are multiple varieties to choose from (chorizo, turkey sausage, chicken and apple sausage ect.) 2. I can buy as little as one sausage instead of buying pre-packaged sausage of 4-6 links. The one sausage I bought cost $1.67.

Prepare the sausage by removing the casing. Add sausage to a small pan and break up into bite size pieces. be sure not to over cook the sausage as it will continue to cook while in the oven. Set sausage aside to let cool.

Prepare mushrooms by removing the stem.  Take a spoon and remove some of the gills from the inside  of the mushrooms. This will allow more space to put the "stuffing". Once Mushrooms are prepared, place in a small bowl with a little bit of olive oil, salt and pepper. Mix thoroughly so that mushrooms are appropriately seasoned.

Combine sausage and goat cheese with a fork and mix until well combined. Begin to stuff mushrooms by packing them full, so that stuffing is almost falling out. Cook at 425 degrees for 15- 20 minutes on a wire rack with a drip pan underneath. This will prevent the mushrooms from sitting in any grease from the sausage. I used a cookie wire rack and placed a cookie sheet on the rack below to catch the drippings.

Garnish with green onion and serve!

This aperitif would be perfect for entertaining guests. You can prepare the mushrooms ahead of time and when the guests arrive, simply place them in the oven. You can also cook them over the grill!

Also here is a picture of my husband, Brett, and I at the wedding this past weekend.


Hope you have a wonderful week! 


Thursday, May 16, 2013

Simple Salads

Happy (belated) Mother's Day to all the super moms out there!

Picnicking in Fort Greene Park!
While I technically am not a mother, I do claim ownership to three feisty kitties and one amazing dog, making me quite the fur-mom. And let me tell you, I had a wonderful Mother's Day!

Most of my family lives in Ohio and since I won't be in that part of the country until this upcoming weekend, I spent the day perusing Brooklyn with my husband, our friend Jessie, and Charlie, our labrador/basset mix.

We began the day at the park, enjoying a picnic of various little sandwiches, a selection of cheeses, and some fresh berries. For dessert we had pieces of chocolate smothered in a very decadent white chocolate peanut butter. Truly divine!

Following the picnic, we went for a leisurely bike ride around the neighborhood and through Prospect Park (Brooklyn's "Central Park"). I recently purchased a 1986 Peugeot road bike from the Brooklyn Flea Market for a really great price--although the low price may actually be reflective of the fact that it's a child's bike... What can I say? I'm short!--and boy is it a joy to ride! I just can't get enough of it.

After our ride, we decided to cool down with a little gardening. My husband and I started a backyard container garden last month and we really enjoy spending time tending it together on the weekends. We tried our hand at a smaller garden last year and while we got some produce we decided to try for more this year. All together we planted 13 plants, including yellow and green zucchini, pickling cucumbers--I'm fantasizing about making Mary's homemade pickles recipe from complete scratch!--Japanese long eggplant and traditional eggplant, 5 types of peppers including jalapenos, Caribbean red peppers, and sweet Italian peppers, and 3 types of tomatoes. We also planted a windowbox spice garden with tarragon, mint, basil, rosemary, sage, oregano, dill, and thyme. I'm so excited for everyone to grow big and tall so we can eat them!

Speaking of eating, enough of my Mother's Day... It's time for some recipes! For today's post, I'd like to celebrate the joy of warmer weather, being outside, and container gardening with three delicious, nutritious, and super simple salads. Every Saturday a local farmer's market forms at the park down the street from my apartment. Not only does the market collect compost and provide a space for recycling textiles, but it's obviously a great place for us to purchase our veggies for the week. This past weekend they had a great selection of lettuce and I admittedly went a little crazy, buying several types out of excitement. So here, dear reader, you have the result of a week's worth of salads.

Cobb Salad
2 hardboiled eggs, diced
1 tomato, diced
blue cheese, crumbled
sunflower seeds or another type of seed or nut
broccoli and/or cauliflower
turkey or chicken, diced
avocado, sliced

With this salad, I simply rough chopped the lettuce and then I tossed the lettuce and broccoli in the dressing before adding the toppings. I kept the dressing simple with a mixture of aged apple cider vinegar, lemon juice, chive and dill infused olive oil, hemp oil, and some salt and pepper. I also would have tossed in some mushrooms but I didn't have any in the house at the time. I must say, cobb salads are amongst my favorites because I feel they're pretty well-balanced, with a variety of protein sources, healthy fats, and fiber.

Smoked Salmon Salad
1 package smoked salmon
1 red onion, diced
1 tomato, diced
mushrooms, diced
Olives
Capers
Feta cheese or blue cheese, crumbled

For this salad, I again started by rough chopping the lettuce and then added the toppings. I enjoy the smoked salmon because it takes a simple salad to the next level by providing protein and omega-3's. The capers and olives add a nice saltiness to balance the smokey fish, and the red onion and tomato add just a dash of sweetness. For the dressing, I again kept it simple with a mixture of aged apple cider vinegar, olive oil, hemp oil, and pepper.

Frisee Salad
Frisee lettuce
2 eggs, poached
cooked duck bacon
pine nuts

For this salad, I used frisee lettuce rather than typical greens to be adventurous; however I think the same concept would be successful with a variety of lettuces, especially endive, boston, or bibb lettuce, although mesclun or arugula would also work I'm sure. I began by tossing the frisee and the bacon in the dressing, which again was a mixture of aged apple cider vinegar, blood orange infused olive oil, hemp oil, and salt and pepper. I then topped the salad with the two poached eggs and pine nuts. You could also add some diced shallot, blue cheese, roasted red bell peppers, and/or tomatoes, but I decided to keep this salad simple since the real bonus is the runny yolk from the poached eggs. Yum!

And... in case you didn't scope it, the picture at the beginning of this post is a card I handmade for my mother-in-law using a page from an old dictionary I found on the street and an image from a recycled advertisement! :) 


Thursday, May 9, 2013

TBT: Rice & Kebabs


So I know I just did both a rice dish as well as a kebab dish. But, I thought I would share with you a couple variations from my previous posts, to show you the versatility of these two concepts. 

Grilled Vegetable Kebab 

When I made those beef kebabs last week, my mushrooms didn't have the robust flavor I was really hoping for. I think it's because we didn't cook the kebabs at a high enough temperature and I didn't season them properly. So I thought I would redeem myself with this vegetable kebab.

I cut a whole zucchini in 1 inch pieces and used large whole mushrooms. I tossed the vegetables in olive oil, s&p, garlic powder and red chili flakes and then began to skewer the kebabs. Then we cooked the kebabs on the highest heat to really get a char on the veggies. Probably about 15 minutes or less. 

I'm not going to lie, those mushrooms were probably the best I have ever had, and I was super sad I only included 2 mushrooms on each kebab!

Tomato, Lemon & Basil Rice

So in a previous post, here, I talked about how I cook rice- lots of water in gradual increments for about 45 minutes. Letting rice take it's time really allows for the rice to cook properly and it gives off a creaminess without needing to add milk, butter or cheese. In this post I cooked the rice the same way as my previous post. With 5 minutes remaining on the rice and while the remaining liquid cooked off, I added quartered grape tomatoes, lemon juice, lemon zest, freshly chopped basil, s&p, red chili flakes. garlic powder and a small tab of butter. 

It was pretty fantastic and I just so happened to bring the leftovers for lunch today!

Hope you enjoyed my quick post today, doing anything fun this weekend? Maybe a grill out? I'll be back at my Alma Mater (also Maegan's Alma Mater) this weekend to watch my sister graduate. So proud of her and also sad to think its been so long since I was there. 

Wednesday, May 8, 2013

Guacamole and Skinny Margs


Happy very belated Cinco de Mayo!

Guacamole de Maegan

Despite common belief, the fifth of May is actually a celebration of Mexican heritage and pride, not independence, and while I am not of actual Mexican decent, I certainly consider Mexican cuisine a part of my heritage. This is because my mom spent a great part of her young adulthood in the Southwestern United States, namely Texas and Colorado, where I was born. During her time there, she learned to cook authentic Mexican dishes, which she then fed to us. As an adult, every time I bite into a dish that's so spicy it brings tears to my eyes and makes my nose run, I think of my parents and dinners at home, us kids complaining about how spicy the food was and my dad responding with "it'll grow hair on your chest!" 

While I thankfully don't have hair on my chest today, I love the fact that when I think of mom's cooking, it's often not only super spicy foods but Mexican meals. My favorite recipe that she has handed down to me, next to a dish called green chili, is guacamole. Whenever I make guacamole, I think about this one time during high school when Mary asked my mom to make it for a family event of our's she was attending because she thought it was the most amazing guacamole she had ever had and she was craving it. Now, I consider Mary to be an honorable member of my family, and I must say she is an amazing cook with a sophisticated palette. I have always taken this compliment to heart, often thinking about it as I make my own guacamole, and for that reason I think it's perfect that today will be the first post we co-author! How about that for heritage and pride? 


In all the years that I have been making my mom's guacamole I have continuously tried to figure out, what's the key that makes it taste so much more wonderful? And I truly think the answer is adding a number of the ingredients nearly to the point of excess. I usually start with 1-3 avocados, depending on the amount of people who will be enjoying it. Experience has taught me to always make more than I think I'll need because this stuff is so yummy, people will be licking the bowl clean in no time if I skimp at all. I begin by halving the avocados, removing the pit, and spooning the fruit out of the shell. I like to hold on to the pits, placing them in a glass of water to try to get them to root, but I have historically had little success, only getting a few to grow which my three cats successfully killed within a year. Nevertheless, its a fun experiment for kids, so I encourage you to give it a try!

After the avocado, I add the remaining ingredients. I typically use red onion, although white onion works just fine if that's all you have or what you prefer. I fine dice the entire onion and then use one half to the whole onion, depending on what I think is appropriate for my guests and the amount of avocado I used. Then I squeeze in the juice of 1 lime. Next I add 2-3 cloves of garlic, minced. It is better to skimp on the garlic than to add to much as my mother taught me that guacamole is the only dish where too much garlic can literally ruin it. Then I add the jalapenos. As I mentioned, I'm a learned spice fiend, and in the tradition of my family I also tend to force my guests to also enjoy my desired spice level, so I usually use an entire can of japs for a single bowl of guac, but of course you can adjust this to your own taste. For this recipe, I also added a beautiful beefsteak tomato and a tomatillo for some added sweetness, both of which I just diced up. I also like to add a dallop of sour cream or mayo for some added zip and creaminess, but if you prefer a more skinny guac, or if there are vegans in your group, this can be omitted without penalty. Finally, I add salt and pepper to a shocking degree so it almost feels like I've used too much. I then stir it all together and give it a try. Then I'll adjust the salt and pepper, as well as the spice level, until it reaches my standards.


Skinny Marg de Mary

If you drink as may boat drinks as my husband and I do (both self-proclaimed Parrotheads and vacation-extraordinaires) you better learn to make them the right way! And the right way just so happens to also be the skinny way- SCORE!

BACK AWAY FROM THE STORE BOUGHT MARGARITA MIX!! If you look at the ingredients of a store-bought strawberry margarita mix, the first ingredient is corn syrup or some other non-organic factory made additive, packed with tons of unnecessary calories. AND blended margarita at a restaurant can run you between 300-400 calories! Blasphamy!! 


There really are only a few ingredients to a prefect margarita: Tequilla, lime juice, Cointreau and agave nectar (for sweetness). And today, I am sharing with you the perfect blended strawberry margarita... a whole pitcher contains only about 580 calories and contains 6 shots of liquor! Which is quite enough to get me dancin' the Samba!

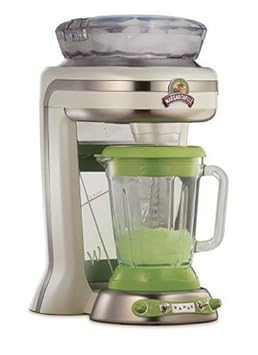
One of the best wedding gifts were were given was a Jimmy Buffett Margarita blender. Firing up that baby in the the middle of February, dreaming of warmer places, sun on my face and screaming Boat Drinks!


Skinny Strawberry Margarita
4 oz. Tequilla
2 oz. Cointreau (Orange Liquor)
2 oz. Lime Juice
2 oz. Orange Juice
1/2 oz. Agave Nectar (you can also use honey or sugar)
1 cup Strawberries
Ice to blend

Serve these margaritas pool-side, ocean-side or sitting on the porch with your favorite people!
Teaser pic- Man on left is my hubs
Hope you enjoyed our first combo-post! Next time we will try to post it before the holiday we are blogging about!

What did you make for Cinco de Mayo?! Be sure to follow up by email or through bloglovin!

xoxo

Maeg&Mar