Thursday, May 9, 2013

TBT: Rice & Kebabs


So I know I just did both a rice dish as well as a kebab dish. But, I thought I would share with you a couple variations from my previous posts, to show you the versatility of these two concepts. 

Grilled Vegetable Kebab 

When I made those beef kebabs last week, my mushrooms didn't have the robust flavor I was really hoping for. I think it's because we didn't cook the kebabs at a high enough temperature and I didn't season them properly. So I thought I would redeem myself with this vegetable kebab.

I cut a whole zucchini in 1 inch pieces and used large whole mushrooms. I tossed the vegetables in olive oil, s&p, garlic powder and red chili flakes and then began to skewer the kebabs. Then we cooked the kebabs on the highest heat to really get a char on the veggies. Probably about 15 minutes or less. 

I'm not going to lie, those mushrooms were probably the best I have ever had, and I was super sad I only included 2 mushrooms on each kebab!

Tomato, Lemon & Basil Rice

So in a previous post, here, I talked about how I cook rice- lots of water in gradual increments for about 45 minutes. Letting rice take it's time really allows for the rice to cook properly and it gives off a creaminess without needing to add milk, butter or cheese. In this post I cooked the rice the same way as my previous post. With 5 minutes remaining on the rice and while the remaining liquid cooked off, I added quartered grape tomatoes, lemon juice, lemon zest, freshly chopped basil, s&p, red chili flakes. garlic powder and a small tab of butter. 

It was pretty fantastic and I just so happened to bring the leftovers for lunch today!

Hope you enjoyed my quick post today, doing anything fun this weekend? Maybe a grill out? I'll be back at my Alma Mater (also Maegan's Alma Mater) this weekend to watch my sister graduate. So proud of her and also sad to think its been so long since I was there. 

Wednesday, May 8, 2013

Guacamole and Skinny Margs


Happy very belated Cinco de Mayo!

Guacamole de Maegan

Despite common belief, the fifth of May is actually a celebration of Mexican heritage and pride, not independence, and while I am not of actual Mexican decent, I certainly consider Mexican cuisine a part of my heritage. This is because my mom spent a great part of her young adulthood in the Southwestern United States, namely Texas and Colorado, where I was born. During her time there, she learned to cook authentic Mexican dishes, which she then fed to us. As an adult, every time I bite into a dish that's so spicy it brings tears to my eyes and makes my nose run, I think of my parents and dinners at home, us kids complaining about how spicy the food was and my dad responding with "it'll grow hair on your chest!" 

While I thankfully don't have hair on my chest today, I love the fact that when I think of mom's cooking, it's often not only super spicy foods but Mexican meals. My favorite recipe that she has handed down to me, next to a dish called green chili, is guacamole. Whenever I make guacamole, I think about this one time during high school when Mary asked my mom to make it for a family event of our's she was attending because she thought it was the most amazing guacamole she had ever had and she was craving it. Now, I consider Mary to be an honorable member of my family, and I must say she is an amazing cook with a sophisticated palette. I have always taken this compliment to heart, often thinking about it as I make my own guacamole, and for that reason I think it's perfect that today will be the first post we co-author! How about that for heritage and pride? 


In all the years that I have been making my mom's guacamole I have continuously tried to figure out, what's the key that makes it taste so much more wonderful? And I truly think the answer is adding a number of the ingredients nearly to the point of excess. I usually start with 1-3 avocados, depending on the amount of people who will be enjoying it. Experience has taught me to always make more than I think I'll need because this stuff is so yummy, people will be licking the bowl clean in no time if I skimp at all. I begin by halving the avocados, removing the pit, and spooning the fruit out of the shell. I like to hold on to the pits, placing them in a glass of water to try to get them to root, but I have historically had little success, only getting a few to grow which my three cats successfully killed within a year. Nevertheless, its a fun experiment for kids, so I encourage you to give it a try!

After the avocado, I add the remaining ingredients. I typically use red onion, although white onion works just fine if that's all you have or what you prefer. I fine dice the entire onion and then use one half to the whole onion, depending on what I think is appropriate for my guests and the amount of avocado I used. Then I squeeze in the juice of 1 lime. Next I add 2-3 cloves of garlic, minced. It is better to skimp on the garlic than to add to much as my mother taught me that guacamole is the only dish where too much garlic can literally ruin it. Then I add the jalapenos. As I mentioned, I'm a learned spice fiend, and in the tradition of my family I also tend to force my guests to also enjoy my desired spice level, so I usually use an entire can of japs for a single bowl of guac, but of course you can adjust this to your own taste. For this recipe, I also added a beautiful beefsteak tomato and a tomatillo for some added sweetness, both of which I just diced up. I also like to add a dallop of sour cream or mayo for some added zip and creaminess, but if you prefer a more skinny guac, or if there are vegans in your group, this can be omitted without penalty. Finally, I add salt and pepper to a shocking degree so it almost feels like I've used too much. I then stir it all together and give it a try. Then I'll adjust the salt and pepper, as well as the spice level, until it reaches my standards.


Skinny Marg de Mary

If you drink as may boat drinks as my husband and I do (both self-proclaimed Parrotheads and vacation-extraordinaires) you better learn to make them the right way! And the right way just so happens to also be the skinny way- SCORE!

BACK AWAY FROM THE STORE BOUGHT MARGARITA MIX!! If you look at the ingredients of a store-bought strawberry margarita mix, the first ingredient is corn syrup or some other non-organic factory made additive, packed with tons of unnecessary calories. AND blended margarita at a restaurant can run you between 300-400 calories! Blasphamy!! 


There really are only a few ingredients to a prefect margarita: Tequilla, lime juice, Cointreau and agave nectar (for sweetness). And today, I am sharing with you the perfect blended strawberry margarita... a whole pitcher contains only about 580 calories and contains 6 shots of liquor! Which is quite enough to get me dancin' the Samba!

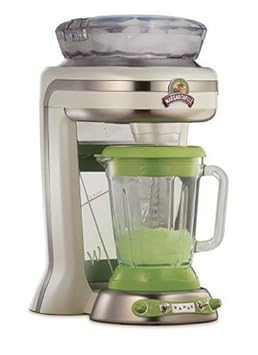
One of the best wedding gifts were were given was a Jimmy Buffett Margarita blender. Firing up that baby in the the middle of February, dreaming of warmer places, sun on my face and screaming Boat Drinks!


Skinny Strawberry Margarita
4 oz. Tequilla
2 oz. Cointreau (Orange Liquor)
2 oz. Lime Juice
2 oz. Orange Juice
1/2 oz. Agave Nectar (you can also use honey or sugar)
1 cup Strawberries
Ice to blend

Serve these margaritas pool-side, ocean-side or sitting on the porch with your favorite people!
Teaser pic- Man on left is my hubs
Hope you enjoyed our first combo-post! Next time we will try to post it before the holiday we are blogging about!

What did you make for Cinco de Mayo?! Be sure to follow up by email or through bloglovin!

xoxo

Maeg&Mar

Thursday, May 2, 2013

Beef Kebabs with a Whiskey Soy Marinade

We had our first taste of summer this week where temperatures hit 80 degrees! In the winter, Chicagoans suffer for months on end, repeating to ourselves "Why do we live here?!", and then we get a small taste of summer and completely forgive and forget that we were forced into hibernation for the last 5 months! One day of 80 degrees and we are all like, "This is the greatest city in THE WORLD!"

So in honor of our beautiful weather this week, here are some of the signs of summer I encountered:


1) The tulips on State Street bloomed on Monday. Nature is just so amazing to me, just two months ago there was no sign of life anywhere and then come April and small pops of green push through the hard Earth and bring life where it was nowhere to be found.

2) Yesterday was the first time I biked to work (is that hipster, Maegan?) and it was the most relaxing and peaceful commute I have ever experienced. I only live three miles from work and Chicago has a lake-front path for pedestrians only. The cool breeze rolling off the lake, sun shining in my face and hundreds of other people making their commute via  motor-less transportation, makes you think that life can't get much better!

3) Annnd my food post of the day! Did anyone else catch that Kenny Chesney line? "And one by one we slide from reality, with nowhere to go, and nowhere to be". I've been channeling my inner sailor/pirate the last month, wishing my summer vacations would come quicker!


Beef Kebabs with a Whiskey Soy Marinade

Marinade
1/4 cup whiskey
1/4 cup soy sauce
1/4 cup worcheshire sauce
2 tbls olive oil
2 tbls cider vinegar
2 tbls black peppercorns
1 tsp garlic powder
1 tsp ground mustard powder
shaking of red chili flakes
handful of chopped cilantro
1/2 lemon


Allow beef to marinade in the refrigerator for a couple hours, obviously the longer it marinades, the more flavor you will get. Use whatever vegetables you have in the house. I use whole mushrooms, red bell pepper and red onion. I'd recommend using a sirloin or another tender form of beef.

The marinade was so delicious! The bitter whiskey was cut by the sweetness in the soy sauce, and the cracked black peppercorns gave the meat the perfect bite!

We enjoyed this meal on our patio while drinking a cold beer and watching the sun set. Oh summer how we love thee!


Hope the weather is treating you as good! Be sure to follow us by email or by bloglovin', it's a great site where you can connect with other blogs of your interest!

<3
Mary

Wednesday, May 1, 2013

Miso Noodle Soup

Also known as the easiest--and healthiest--version of ramen noodles you'll ever eat, I made this meal last week when I was in a serious time crunch and had some snow peas starting to go soft in the crisper. I currently work as a Learning Specialist at one of the top art and design schools, and I guess finals fever got to my head when my mind paired "easy" and "quick" with "ramen noodles." However, rather than using actual ramen noodles for this dish, I used ramen-style noodles, which I got in the Asian aisle at my local market. In addition to helping me create a more sound food blog entry, choosing ramen-style noodles over ramen soup packets also allows me to make my own seasoning without all the sodium--and without wasting a flavor packet. Also, while you could make this soup using any stock you have available, I opted to use miso paste as it's easy to find at most grocery stores, it's super affordable, and it's versatile, meaning I'm sure I'll find a use for it in a number of other dishes.

Ingredients
1 package ramen-style noodles
1 shallot, diced
3-4 cloves garlic, minced
mushrooms, sliced
snow peas
miso soybean paste

In a large pot, bring about 4 cups of water to a boil. Stir in the miso paste--I just followed the directions on the back of the package and adjusted it according to my own miso tastes. I also added a dash of mushroom base and soy sauce for added flavor depth. Next, add the onion, garlic, and snow peas and allow to cook for 3-4 minutes. Then add the noodles and mushrooms and remove from heat. Allow the soup to steep for about 5 minutes, or until the noodles are tender.

Alternatively, you can simply add the ingredients to boiling water and wait about 10 minutes for everything to become tender. This is a great alternative for the office or a dorm room where a tea kettle or microwave may be your only option. Ahh, the joy of college nostalgia!

Friday, April 26, 2013

Chicken & Homemade Barbecue Sauce


Even us food bloggers eat boring dishes like chicken and broccoli on occasion. But last night we were sitting on the couch thinking about how we should prepare the chicken. I was pretty bummed because I thought BBQ chicken on the grill sounded amazing, but we didn't have any BBQ sauce in the house.

Then I thought- Hey! I probably have all the ingredients to make a BBQ sauce in my cupboard and refrigerator, and that's exactly how I took this boring chicken and broccoli dish to a delicious and perfectly delightful dish.

We were waiting on a baked potato to cook, so I had about 45 minutes to spare once I decided to make the BBQ sauce, granted I could have walked the one block to the grocery store and pick up a bottle of BBQ, but then I would have had to walk down and back up four floors. Making it in-house ended up being cheaper anyway!

The basic ingredients to a tomato-based BBQ sauce are: ketchup, vinegar, worcestershire sauce and brown sugar. Then you can add any spices you desire, typically chile powder, ground mustard and some form of heat: cayenne pepper, tabasco sauce or jalepaneos.


Barbecue Sauce
1 cup ketchup
3/4 cup vinegar (i used white wine)
3/4 cup brown sugar
1/4 cup worcestershire sauce
2 tbls chile powder
1 1/2 tbls mustard
1/2 tbls ground ginger
1/2 tbls ground white onion
Cayenne pepper to taste
2 tbls olive oil
Juice of 1/2 lemon

Heat ingredients in a small saucepan over medium heat. Allow flavors to meld, stir occasionally for 5 minutes. Serve extra sauce in a ramekin for dipping.


This was the first homemade BBQ sauce I have made, and I'm sure with the summer coming up, we will add a few more varieties for your reading pleasure :)

Oh and here is a random picture of my dear Grandma at the new casino in Cincinnati. Is she not the cutest?!


Hope you have a great weekend!!

<3
Mary

Wednesday, April 24, 2013

Almond Crusted Striped Bass with Sauteed Kale


Today is expected to be a beautiful 70 degree day in Brooklyn, and already I'm crawling out of my skin to get out of my office and into the sunshine! When it's this beautiful out, I prefer to spend my evenings either jogging at the park or sitting at a sidewalk cafe, sipping wine or a cold beer--which means that dinner prep needs to be quick!

I came up with this meal idea one night when I had some extra fish from another meal that I didn't want to go to waste. It was late, and I'm not a fan of eating right before bed, so I wanted to make something quick yet healthy. I've always known about the health benefits of eating fish, but I also felt skeptical about the whole mercury and seafood issue, so when I stumbled upon this NPR article many of my concerns about where and how to safely obtain my omega-3's were demystified.

I decided to use kale as the side in this meal because, as I'm learning more and more, kale is a superhero of the vegetable family. It takes 15 minutes or less to prepare, whether as chips, a salad, or served sauteed or steamed, and its nutritional values are numerous: Kale is unusually high in fiber and other important vitamins and antioxidants, which can help prevent heart disease, osteoporosis, and cancer. Additionally, kale promotes healthy cognitive function as well as a positive mood, making it a great brain food to boot! I literally can't get enough of it!


Sauteed Kale
1 bunch kale, cleaned and rough chopped
3-4 cloves garlic, minced
1 onion, diced
salt and pepper

Preheat about 1 tbsp extra virgin olive oil in a medium skillet over medium heat. Add the onion and cook for about 2 minutes, or until translucent. Add a dash of white wine to deglaze. Then add the kale and garlic and cook for about 5 more minutes, or until the kale cooks down. Add the salt and pepper to taste. I also like to add other vegetables I have lying around, such as fresh tomatoes or red and yellow peppers. Remember, the more color, the merrier (and healthier!) the meal.

Also, if you are looking for increased health benefits from the kale, I'd recommend skipping the saute pan and steaming the kale instead. To enhance flavor, steam the kale with garlic; not only do the two pair well, but the health benefits of garlic are also through the roof!

Almond Crust
1/2 c unsalted almonds
1 tbsp flour
2 tsp cayenne pepper
1 tsp coriander
1 tbsp fresh dill, chopped
zest of 1 orange

Season the fish lightly with salt and pepper on both sides. Set aside.

Place almonds in a food processor and process until crushed. Add flour, orange zest, and spices. Then coat both sides of each piece of fish with almond mixture.


In a medium skillet over medium heat, preheat about a tablespoon or two of olive oil. Cook for about 8-10 minutes per side, being careful not to tear the fish when flipping.

I like to serve the fish atop the bed of kale, but you can also put it on the side. Also, because I didn't have lemon in the house when I made this dish, I simply substituted orange, a decision I'd pass along to you, dear readers, as it proved to be a fresh twist on a classic fish.


Thursday, April 18, 2013

Caramelized Onions and Mushrooms Burger with melted Gouda & Garlic Dill Aoili


Well Spring is officially here is Chicago, however it is not what we had dreamed about all Winter. It hasn't stopped raining all week and we haven't seen much of that thing called the Sun! Thankfully though, I will be able to skip out on this weather for a long weekend in Vegas with my best girlfriends.

A few weeks back I made THE BEST burger, I have had in our kitchen. We go to a lot of specialty burger places such as Butcher and the Burge, Kuma's & Burger Bar, but I hadn't made a gourmet burger in my house until this baby!

We use a simple seasoning on our burgers, just salt and pepper. Grilled to a perfect medium, couple slices of melted Gouda, placed on a toasted sesame bun with caramelized onions and mushrooms, arugula, slice of tomato and my garlic dill aoili.

To caramelize the onions and mushrooms will take about 15 minutes, maybe more. While my husband was preparing the burgers, I started chopping the veggies we would need for the burger.

Caramelized Onions and Mushrooms
1/2 to 1 medium onion
1/2 package of mushrooms
Olive Oil
Salt & Pepper

Slice the onions and mushrooms and place in a large skillet  with a good portion of oil. Heat should be at medium to high. Be sure to find the right temperature to allow the onions and mushrooms to cook slowly and gradually turn a deep golden brown color.  Cook for probably 5 minutes longer than the picture below:


Garlic Dill Aoili


2 cloves minced garlic
1 tsp garlic powder (more or less depending on desired flavor)
1 tbls or more of chopped fresh dill
1/4 cup mayonnaise
Juice from 1/2 lemon
Cayenne pepper to taste

Add ingredients in a small bowl and combine well. Add more of less of each ingredient based on your tastes. The texture should be rather liquidy due to the lemon juice. I prefer to use a lot of lemon juice as to make the sauce lighter and less thick. Add enough garlic and garlic powder so that you can definitely taste the garlic flavor.  I had dill in the house so I thought that would be a nice fresh addition as well.

Once I was finished with the garlic dill aoli, I still felt that it was a little heavy for my tastes, so I added a bit of cayenne pepper to cut the savoriness of the sauce.


Hope you guys are having a great day!!

Mary


Wednesday, April 17, 2013

Grilled Mahi Mahi with a Saffron Cream Sauce

Fish Special:  Grilled Mahi-Mahi with a saffron cream sauce and served on a bed of lemon rice and roasted asparagus


On Sunday, after my husband and I finished 9 holes of golf, I cooked up this beautiful and delicious dish. Earlier in the day, I stopped by the local fish market and picked up a fresh piece of Mahi-Mahi. I initially had wanted to pick up a piece of halibut for this dish, but the halibut was a bit expensive, so I went with another white fish, a little more in my price range. As always, use what looks best to you.

The fish had been flown in that morning so it was super fresh. In order to not overpower the natural flavor of the fish, I used a simple seasoning of salt and pepper. I cooked the fish on the grill, skin-side down for 10 minutes and at the last minute, I squeezed 1/2 a lemon on top of the fish. (See the bottom of this entry for tips on cooking fish on the grill)

A big part of this meal was the timing. I started the rice first, estimating it would take about 40 minutes. Once the rice was on, I started preparing the saffron cream sauce. After 25 minutes, I started the asparagus and dropped the fish on the grill after 30 minutes.

I wrapped the asparagus in aluminum foil with butter, garlic powder, red chili flakes, fresh thyme and salt & pepper. I placed the asparagus on the top shelf of the grill and let cook for 15 minutes.

Saffron Cream Sauce
Saffron is pretty expensive, so if you don't have it in your house, simply exclude it from the sauce and you will still have a lovely cream sauce to go with the fish. Also, there are many recipes for a saffron cream online, however I thought it would tasty and visually appealing to add tomatoes to the sauce. It sure did give the fish one last pop of color and texture. However, be sure not to cook the tomatoes too long otherwise they will break down and become mush.

1 diced shallot
2 minced garlic cloves
3 tbls butter
1 medium tomato diced
1/2 cup dry white wine
1/2- 1 cup heavy cream
2 pinches saffron
Cayenne pepper (to taste)

Saute shallots and garlic in the butter over medium high heat until shallots are translucent and garlic is lightly browned. Add tomatoes and saute for one more minute. Add white wine and cook until wine reduced by half- couple minutes. Then add heavy cream, saffron and cayenne pepper.


Lemon Rice
For the rice, I used slow cooking brown basmati rice.  I don't follow the cooking instructions on the bag, because I find that I never have enough water to properly cook the rice, based on the instructions. Here is how I do it, based on 1 cup of dry rice:

Step 1: Fill sauce pot with 2- 3 cups of water, add a pinch of salt and a bit of oil to the water. Bring to a boil.
Step 2: Add rice and lower heat to medium, a gentle boil
Step 3: Watch the pot over the next half hour, adding more water in 1/4 cup increments as needed. Continue tasting rice throughout cooking process to measure doneness.
Step 4: When rice is the texture of your liking, turn heat on high to remove any residual water, and squeeze a half of a lemon in the rice.


Cooking tips for cooking fish on the grill:
  • Don't mess with it once on the grill: I only cook fish on the grill if the skin is still on it, otherwise I will use a piece of aluminum. I don't like dealing with the filet falling apart, so I also do not flip the fish. 
  • Simple seasoning: When cooking with high quality fish, use only a simple seasoning of salt and pepper as to not mask the flavor of the fish.
  • Cook for 8-15 minutes depending on the thickness of the fish. When the fish is done, it should be flaky with a fork.
  • Lemon: When the fish is almost finished cooking, squeeze half a lemon on top.

Would you try this dish? Did you know that Dolphin Fish is the same thing as Mahi-Mahi?

Bon Appetit!

Mary 

Wednesday, April 3, 2013

Roasted Shrimp Cocktail & Roasted Brussels Sprouts


My husband and I stayed local for our Easter celebrations this past weekend. My parents were kind enough to purchase us a Honey Baked Ham, so all I had to do on Sunday was prepare a few side dishes and an app or two.

After an hour and forty-five minute Easter Sunday mass, paired with a mile walk home in 4 inch heels, I was ready to sit on the couch and watch sports all day.  The prep work for these dishes was so simple and I was able to enjoy the company I sooo love to keep!

 When I went shopping for my Easter dinner, I stopped at the local Produce Market and Fish Market and drew inspiration from what was in the stores. Every time I walk into the produce market, I try to find an ingredient that I have never worked with. This winter I began cooking with poblano peppers, butternut squash and kale. For Easter I decided to make a fresh shrimp cocktail and roasted brussels sprouts.


Roasted Shrimp with a Homemade Cocktail Sauce


So here is my take on homemade cocktail sauce... Although it may be easier to purchase cocktail sauce than make it on your own, a homemade sauce brings the dish to a whole new level, especially pairing roasted shrimp with this cocktail sauce!

I had all these ingredients in the house besides the horseradish. Instead of purchasing the cocktail sauce, using only half and then throwing the rest away, I now have stocked my refrigerator with horseradish sauce that I can eventually use in other recipes. And I believe the horseradish sauce was cheaper than the cocktail sauce.

Typically I try to make things homemade so that I can limit the amount of preservatives and "unknown" ingredients, but I don't think that applies here, because the ketchup and the horseradish sauce probably include lots of ingredients I cannot pronounce.

Roasted Shrimp
1/2 lb - 1 lb raw shrimp, shelled and deveined (leave tail on for dipping)
1 tbs Olive oil
Red pepper flakes
Garlic powder
Salt & pepper to taste

Place shrimp on baking sheet, add spices and olive oil and toss shrimp until oil coats the shrimp. Roast at 350 degrees for 8-10 minutes or until pink.  Allow shrimp to fully cool in refrigerator before serving ~30 minutes.

Cocktail Sauce
1/4 cup Ketchup
2 tbs Horseradish sauce (more or less depending upon your taste)
1 tsp Worcestershire
1 tsp Chili powder
1 tsp Garlic powder
1/2 tsp Cayenne pepper

Mix ingredients together and adjust ingredients based on your tastes.


Roasted Brussels Sprouts with shaved Parmigiano-Reggiano


Brussels sprouts
Garlic powder
Oregano   
Red chili flakes
Parmigiano-Reggiano- freshly grated
  Olive oil
   Salt & pepper to taste

Toss brussel sprouts in olive oil and add spices, mix well and place on baking sheet. Roast at 350 degrees for 40 minutes, or until brussel sprouts are brown. Shake the sheet a few times during roasting to ensure even roasting. Add parmesan after taking the baking sheet out of the oven. Serve immediately.


Hope you are having a good week! What are some of the dishes you had for Easter? Please share!!

Thankss!

Mary

Tuesday, April 2, 2013

Apple Pie with Medieval Pastry Crust

Game of Thrones has returned! And to celebrate the start of the third season, I wanted to make a dish inspired by my A Feast of Ice & Fire: The Official Game of Thrones Companion Cookbook, which I got a little while back as an anniversary gift from my husband and sadly haven't used yet.

Although I originally opened the GOT cookbook with dinner in mind, I had also purchased a bag of golden delicious apples earlier in the weekend from my local farmer's market for an apple dessert. Saffron pastry dough and lemon pastry dough with vanilla are some of the first recipes in the book, so I decided to make a rich, savory crust for a crisp and sweet apple pie using a version of the two recipes: I added orange zest and bourbon barrel vanilla to the saffron pastry dough recipe.

Apple Filling: 
2-3 lbs golden delicious apples, diced
1/4 c brown sugar
1 tbsp melted butter
2 tbsp cinnamon
1 tbsp vanilla extract
1 tbsp sea salt

In Advance: Combine ingredients in a large bowl. I also added a healthy dash of cayenne pepper, as well as maple powder and lavender sugar for a sweet and floral punch. I got both of these wonderful sweeteners, along with my bourbon barrel vanilla extract, from the wonderful Colonel De spice market in Cincinnati, Ohio. I then let the apple mixture rest in the refrigerator overnight so the flavors could mingle. If you don't have overnight, then let the apples rest for at least a few hours. Before adding the apples to the pie crust, stir in about 1-2 tbsp flour or cornstarch.

Medieval Pastry Dough
1/2 c water
1 tbsp vanilla
zest of 1 orange
Pinch of saffron
3 c flour
2 eggs, lightly beaten
1 stick butter, room temperature

Preheat oven to 400°F.

Combine water, zest, and vanilla and dissolve saffron in mixture. Meanwhile, cut the butter into the flour. Add the yolks and vanilla water until incorporated and a soft dough forms. Add more water or flour as needed.

Divide the dough into 2 parts for one 9" pie or 3 parts for two 8" pies. Roll out the dough for the bottom crust to about 1/4" to 1/8" thickness and place into pan. Shape and stab with a fork a few times. Add the apple filling.

Roll out the dough for the top crust and shape. Top with brown sugar and cinnamon. I also added a dash more of the the maple powder, lavender sugar, and orange zest.

Bake for about 10 minutes and then lower temperature to 350°F and bake for another 15-20 minutes or until crust is golden brown. Serve warm with vanilla ice cream.